374
AutoCAD and Its Applications—Basics
Direction and Rotation Controls
To array items in a counterclockwise direction, activate the
Direction
button in the
Properties
ribbon panel, or enter a positive value while using the
Fill angle
option. To
array items in a clockwise direction, deselect the
Direction
button, or enter a negative
value while using the
Fill angle
option.
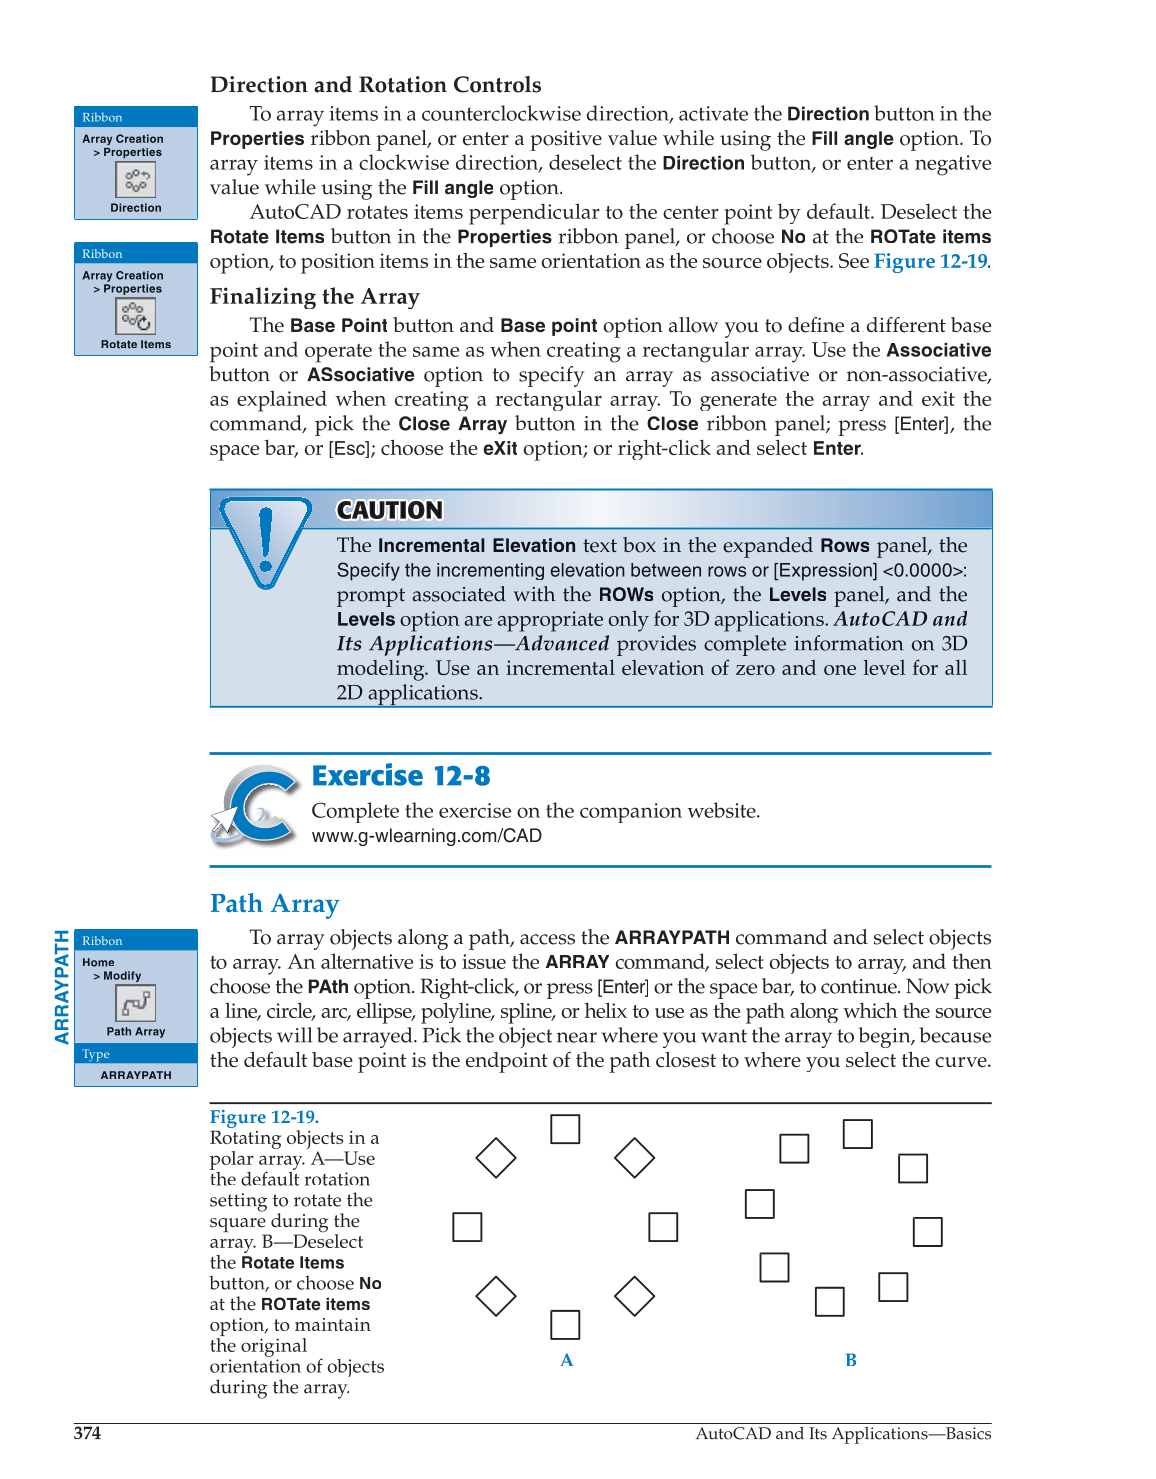
AutoCAD rotates items perpendicular to the center point by default. Deselect the
Rotate Items
button in the
Properties
ribbon panel, or choose
No
at the
ROTate items
option, to position items in the same orientation as the source objects. See Figure 12-19.
Finalizing the Array
The
Base Point
button and
Base point
option allow you to define a different base fi
point and operate the same as when creating a rectangular array. Use the
Associative
button or
ASsociative
option to specify an array as associative or non-associative,
as explained when creating a rectangular array. To generate the array and exit the
command, pick the
Close Array
button in the
Close
ribbon panel; press [Enter], the
space bar, or [Esc]; choose the
eXit
option; or right-click and select Enter.
CAUT CA A U U T TI ON N
The
Incremental Elevation
text box in the expanded
Rows
panel, the
Specify the incrementing elevation between rows or [Expression] 0.0000:
prompt associated with the
ROWs
option, the
Levels
panel, and the
Levels
option are appropriate only for 3D applications. AutoCAD and
Its Applications—Advanced provides complete information on 3D
modeling. Use an incremental elevation of zero and one level for all
2D applications.
Exercise 12-8
Complete the exercise on the companion website.
www.g-wlearning.com/CAD
Path Array
To array objects along a path, access the
ARRAYPATH
command and select objects
to array. An alternative is to issue the
ARRAY
command, select objects to array, and then
Y
choose the
PAth
option. Right-click, or press
[Enter]
or the space bar, to continue. Now pick
a line, circle, arc, ellipse, polyline, spline, or helix to use as the path along which the source
objects will be arrayed. Pick the object near where you want the array to begin, because
the default base point is the endpoint of the path closest to where you select the curve.
Ribbon
Array Creation
Properties
Direction
Ribbon
Array Creation
Properties
Rotate Items
ARRAYPATH
Ribbon
Home
Modify
Path Array
Type
ARRAYPATH
Figure 12-19.
Rotating objects in a
polar array. A—Use
the default rotation
setting to rotate the
square during the
array. B—Deselect
the
Rotate Items
button, or choose
No
at the
ROTate items
option, to maintain
the original
orientation of objects
during the array.
A B