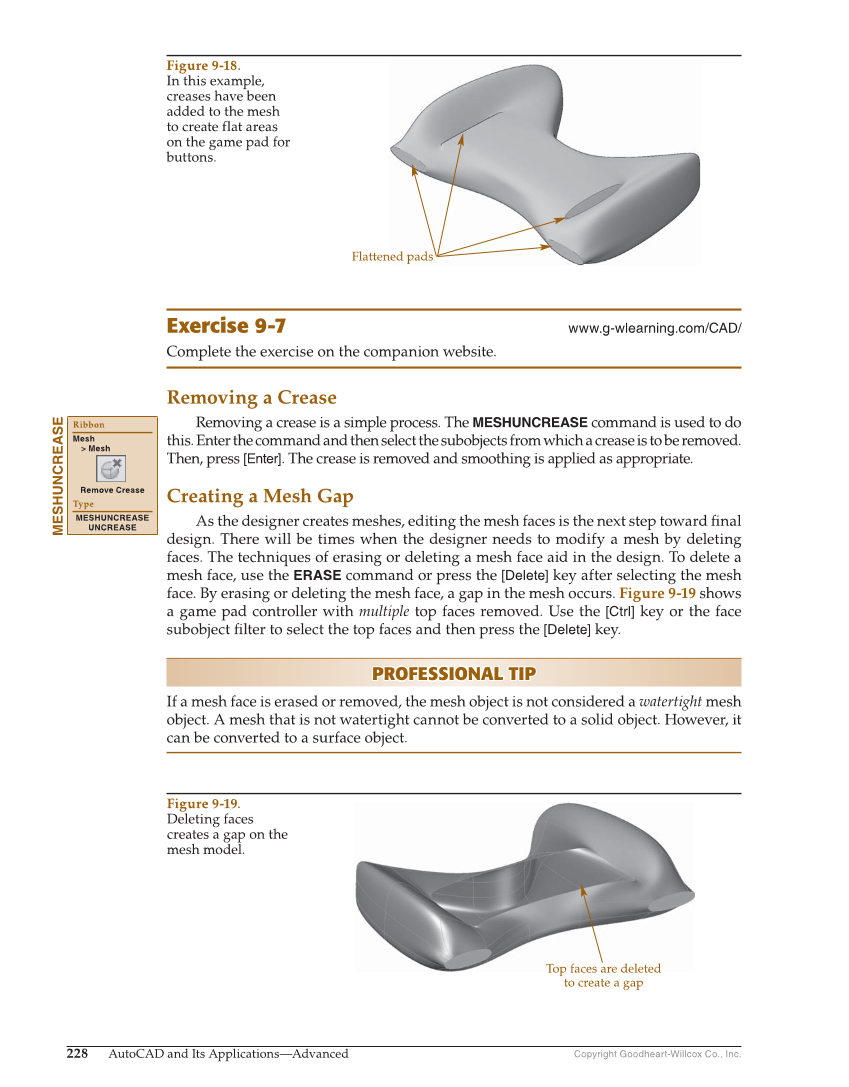
Copyright Goodheart-Willcox Co., Inc. 228 AutoCAD and Its Applications—Advanced Exercise 9-7 www.g-wlearning.com/CAD/ Complete the exercise on the companion website. Removing a Crease Removing a crease is a simple process. The MESHUNCREASE command is used to do this. Enter the command and then select the subobjects from which a crease is to be removed. Then, press [Enter]. The crease is removed and smoothing is applied as appropriate. Creating a Mesh Gap As the designer creates meshes, editing the mesh faces is the next step toward fi nal design. There will be times when the designer needs to modify a mesh by deleting faces. The techniques of erasing or deleting a mesh face aid in the design. To delete a mesh face, use the ERASE command or press the [Delete] key after selecting the mesh face. By erasing or deleting the mesh face, a gap in the mesh occurs. Figure 9-19 shows a game pad controller with multiple top faces removed. Use the [Ctrl] key or the face subobject fi lter to select the top faces and then press the [Delete] key. PROFESSIONAL TIP PROFESSIONAL TIP If a mesh face is erased or removed, the mesh object is not considered a watertight mesh object. A mesh that is not watertight cannot be converted to a solid object. However, it can be converted to a surface object. MESHUNCREASE Ribbon Mesh Mesh Remove Crease Type MESHUNCREASE UNCREASE Top faces are deleted to create a gap Figure 9-19. Deleting faces creates a gap on the mesh model. Flattened pads Figure 9-18. In this example, creases have been added to the mesh to create flat areas on the game pad for buttons.