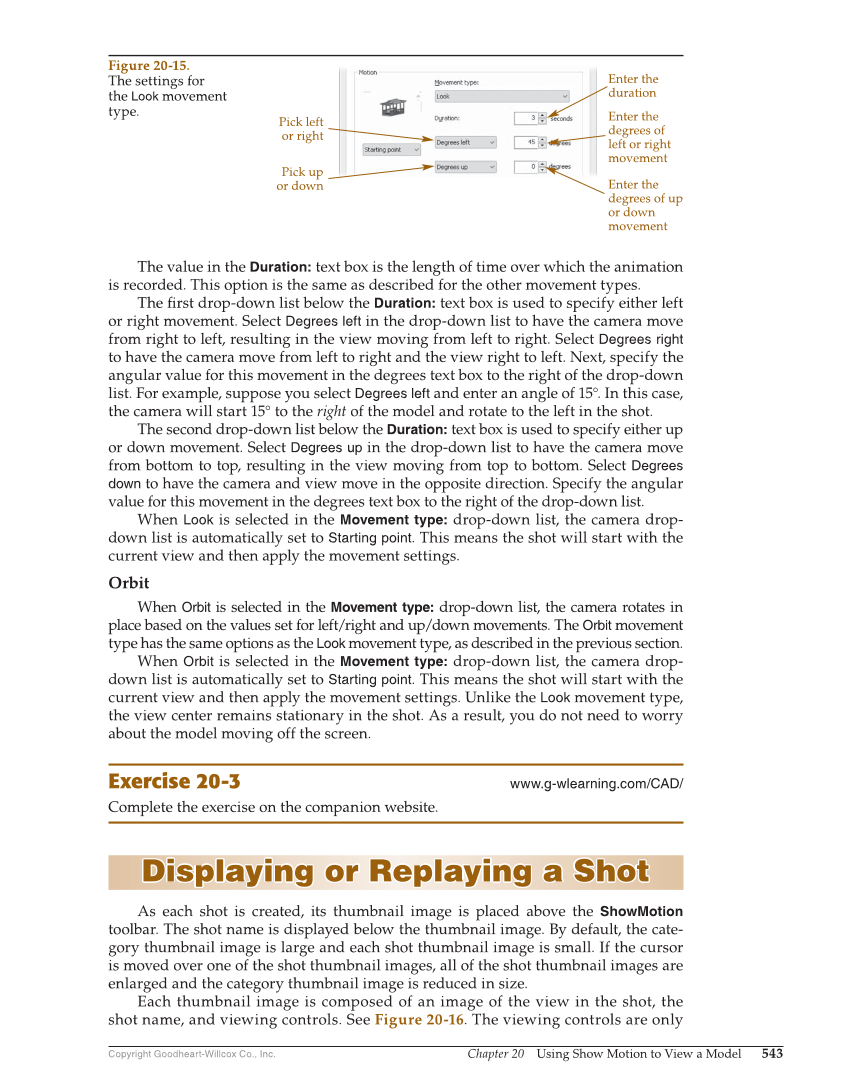
Chapter 20 Using Show Motion to View a Model 543 Copyright Goodheart-Willcox Co., Inc. The value in the Duration: text box is the length of time over which the animation is recorded. This option is the same as described for the other movement types. The fi rst drop-down list below the Duration: text box is used to specify either left or right movement. Select Degrees left in the drop-down list to have the camera move from right to left, resulting in the view moving from left to right. Select Degrees right to have the camera move from left to right and the view right to left. Next, specify the angular value for this movement in the degrees text box to the right of the drop-down list. For example, suppose you select Degrees left and enter an angle of 15°. In this case, the camera will start 15° to the right of the model and rotate to the left in the shot. The second drop-down list below the Duration: text box is used to specify either up or down movement. Select Degrees up in the drop-down list to have the camera move from bottom to top, resulting in the view moving from top to bottom. Select Degrees down to have the camera and view move in the opposite direction. Specify the angular value for this movement in the degrees text box to the right of the drop-down list. When Look is selected in the Movement type: drop-down list, the camera drop- down list is automatically set to Starting point. This means the shot will start with the current view and then apply the movement settings. Orbit When Orbit is selected in the Movement type: drop-down list, the camera rotates in place based on the values set for left/right and up/down movements. The Orbit movement type has the same options as the Look movement type, as described in the previous section. When Orbit is selected in the Movement type: drop-down list, the camera drop- down list is automatically set to Starting point. This means the shot will start with the current view and then apply the movement settings. Unlike the Look movement type, the view center remains stationary in the shot. As a result, you do not need to worry about the model moving off the screen. Exercise 20-3 www.g-wlearning.com/CAD/ Complete the exercise on the companion website. Displaying or Replaying a Shot Displaying or Replaying a Shot As each shot is created, its thumbnail image is placed above the ShowMotion toolbar. The shot name is displayed below the thumbnail image. By default, the cate- gory thumbnail image is large and each shot thumbnail image is small. If the cursor is moved over one of the shot thumbnail images, all of the shot thumbnail images are enlarged and the category thumbnail image is reduced in size. Each thumbnail image is composed of an image of the view in the shot, the shot name, and viewing controls. See Figure 20-16. The viewing controls are only Enter the duration Enter the degrees of up or down movement Pick left or right Pick up or down Enter the degrees of left or right movement Figure 20-15. The settings for the Look movement type.