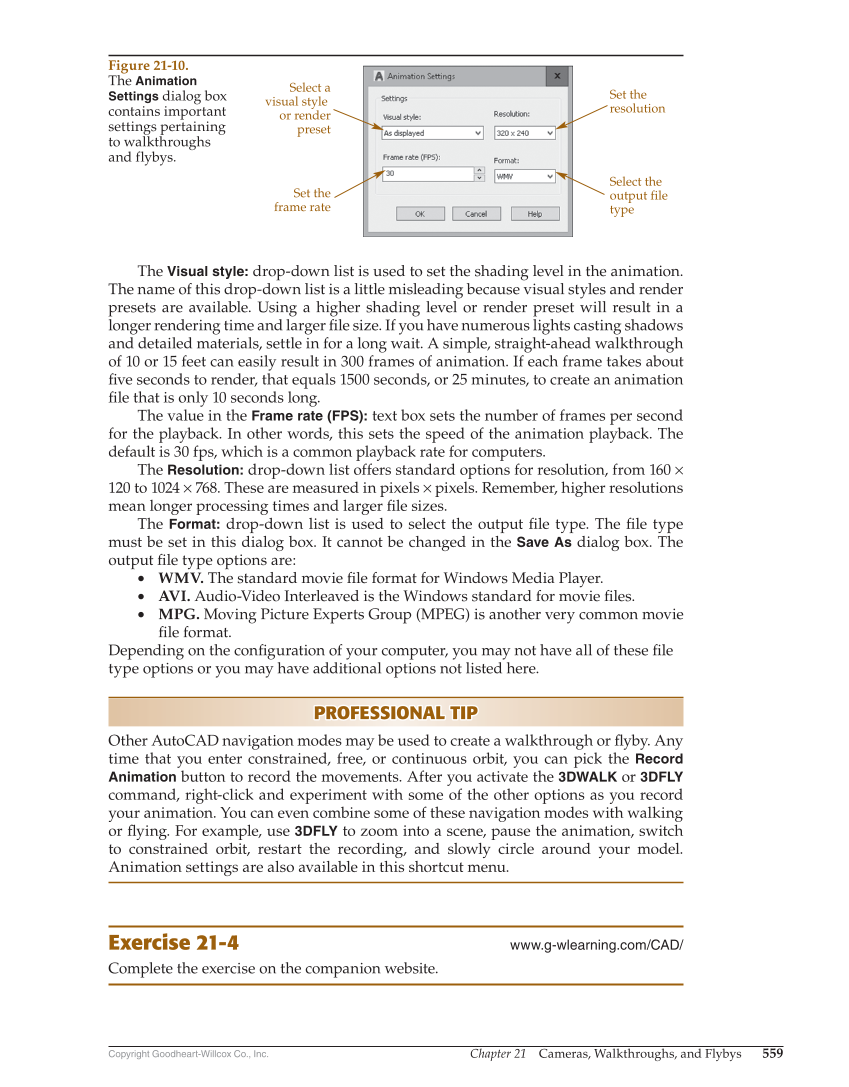
Chapter 21 Cameras, Walkthroughs, and Flybys 559 Copyright Goodheart-Willcox Co., Inc. The Visual style: drop-down list is used to set the shading level in the animation. The name of this drop-down list is a little misleading because visual styles and render presets are available. Using a higher shading level or render preset will result in a longer rendering time and larger fi le size. If you have numerous lights casting shadows and detailed materials, settle in for a long wait. A simple, straight-ahead walkthrough of 10 or 15 feet can easily result in 300 frames of animation. If each frame takes about fi ve seconds to render, that equals 1500 seconds, or 25 minutes, to create an animation fi le that is only 10 seconds long. The value in the Frame rate (FPS): text box sets the number of frames per second for the playback. In other words, this sets the speed of the animation playback. The default is 30 fps, which is a common playback rate for computers. The Resolution: drop-down list offers standard options for resolution, from 160 × 120 to 1024 × 768. These are measured in pixels × pixels. Remember, higher resolutions mean longer processing times and larger fi le sizes. The Format: drop-down list is used to select the output fi le type. The fi le type must be set in this dialog box. It cannot be changed in the Save As dialog box. The output fi le type options are: • WMV. The standard movie fi le format for Windows Media Player. • AVI. Audio-Video Interleaved is the Windows standard for movie fi les. • MPG. Moving Picture Experts Group (MPEG) is another very common movie fi le format. Depending on the confi guration of your computer, you may not have all of these fi le type options or you may have additional options not listed here. PROFESSIONAL TIP PROFESSIONAL TIP Other AutoCAD navigation modes may be used to create a walkthrough or fl yby. Any time that you enter constrained, free, or continuous orbit, you can pick the Record Animation button to record the movements. After you activate the 3DWALK or 3DFLY command, right-click and experiment with some of the other options as you record your animation. You can even combine some of these navigation modes with walking or fl ying. For example, use 3DFLY to zoom into a scene, pause the animation, switch to constrained orbit, restart the recording, and slowly circle around your model. Animation settings are also available in this shortcut menu. Exercise 21-4 www.g-wlearning.com/CAD/ Complete the exercise on the companion website. Select a visual style or render preset Set the resolution Set the frame rate Select the output file type Figure 21-10. The Animation Settings dialog box contains important settings pertaining to walkthroughs and flybys.